

Why You’ll Love This Dessert
If you’re looking for a delightful treat that’s both fun and healthy, this dessert is perfect for you! It combines creamy yogurt with peanut butter and chocolate chips for an unbeatable flavor. They are easy to make and are perfect for hot days when you want something cool and satisfying. They also pack a protein punch thanks to the yogurt and peanut butter, making them a great option for a snack or dessert that won’t leave you feeling guilty. Additionally, kids and adults alike will enjoy the deliciousness of these frozen treats. You can customize these bars to suit your taste, making them a versatile addition to your dessert repertoire. Whether you’re planning a family gathering, a summer barbecue, or just a quiet evening at home, these tasty bars will be a hit!
Key Ingredients
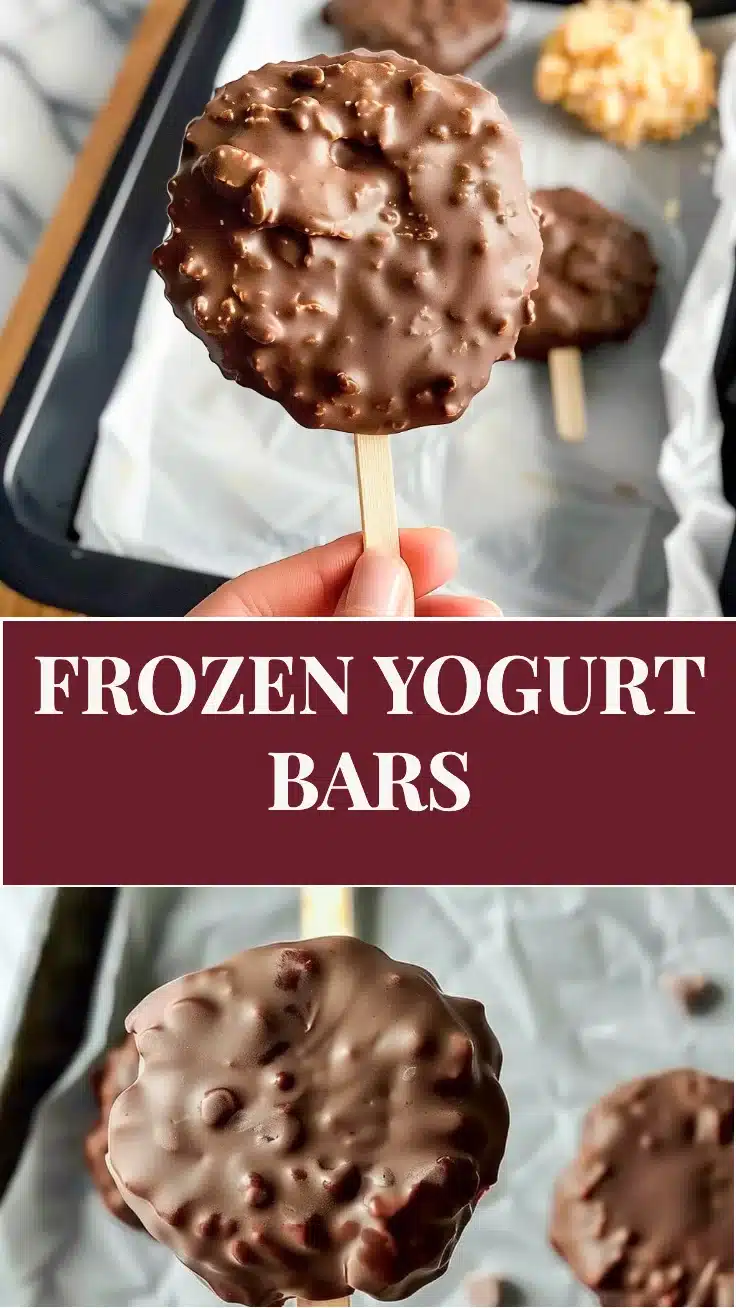
Creating these delicious bars does not require a long list of complicated ingredients. You’ll start with yogurt as the base, which provides a creamy texture and tangy flavor. Greek yogurt is a great choice for extra protein, making this a healthy dessert choice. Then, you’ll add creamy peanut butter for richness and an amazing taste. Chocolate chips bring sweetness and a comforting chocolate flavor that everyone loves. Additionally, you’ll need nuts as a crunchy topping. Choose your favorite variety, such as almonds or walnuts, to add extra nutrition and texture. Lastly, a splash of coconut oil is used to create a smooth chocolate coating that makes the bars extra special. This combination leads to a high-protein dessert that is simple and keeps you cool in the summer heat!
Ingredient Substitutions and Alternatives
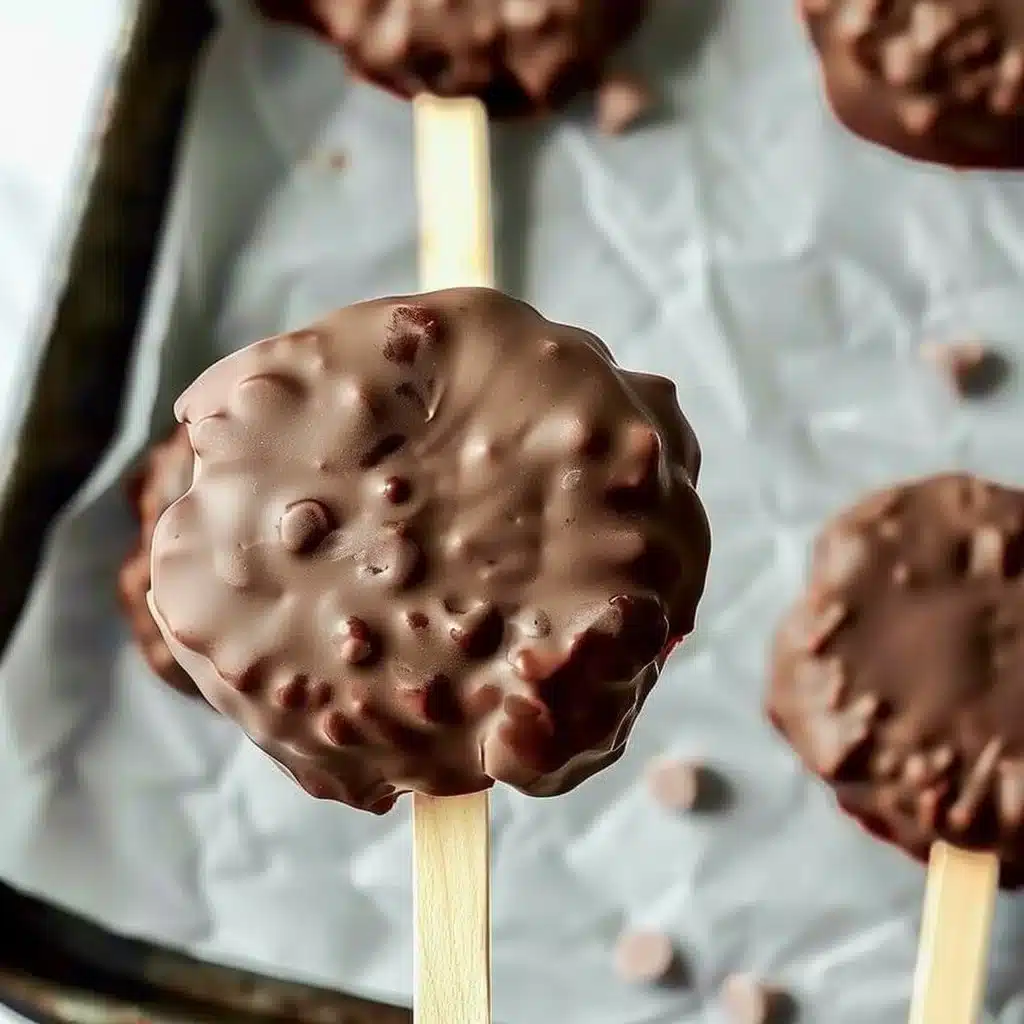
If you have dietary restrictions or simply want to make small changes, there are plenty of ways to customize the ingredients for these bars. For a non-dairy option, you can substitute regular yogurt with coconut yogurt or soy yogurt. These alternatives will still provide creamy texture without the dairy. If you’re not a fan of peanut butter, almond butter, sunflower seed butter, or any nut butter can be used instead for a similar flavor profile. For a vegan option, ensure that your chocolate chips are dairy-free. You can also substitute the nuts on top with seeds or skip them entirely if allergies are a concern. Moreover, if you want these bars to be lower in sugar, you can use sugar-free chocolate chips or add a natural sweetener, like honey or agave syrup, to taste. With these adjustments, you can make a homemade dessert that fits your dietary needs and taste preferences!
Step-by-Step Instructions
Making these delightful bars is straightforward and fun! Begin by preparing your workspace by lining a large baking sheet with parchment paper or a silicone mat. This will keep your bars from sticking and make cleanup easier. In a bowl, mix together the yogurt, peanut butter, and chocolate chips until everything is fully combined. You want a mixture that is smooth and creamy. Once mixed, use a spoon or a scoop to place piles of the yogurt mixture onto the prepared baking sheet. Each pile should be about 1/4 to 1/3 of the mixture and shaped into a round circle that’s about 3 inches wide.
Next, insert a popsicle stick halfway into each dollop in the center, ensuring it has good support. To finish it off, sprinkle your chosen nuts evenly on top. After this, it’s time to freeze! Place your baking sheet in the freezer for at least 2 hours or until the yogurt has completely set. After they are firm, prepare the chocolate coating in a microwave-safe bowl by mixing chocolate chips and coconut oil. Heat it in the microwave in 20-second bursts until melted and smooth. Quickly dip each yogurt pop into the melted chocolate, ensuring they are well coated, then return them to the freezer to harden. In just a few simple steps, you will have delightful frozen bars ready to enjoy!
Directions
Line a large baking sheet with parchment paper or a silicone mat. In a bowl, mix together the yogurt, peanut butter, and chocolate chips until fully combined. Place piles of the yogurt onto the parchment paper, about 1/4- 1/3 of the mixture each. Spread it out into a circle that’s about 3 inches around. Place a popsicle stick halfway into each yogurt mixture, making sure that it’s in the center and covered on the top and bottom. Sprinkle on the nuts evenly.
Place in the freezer for at least 2 hours to harden. Once hardened, prepare the chocolate coating by combining the chocolate and coconut oil, melting in the microwave in 20-second increments, stirring in between. Dip the yogurt pops into the chocolate, working quickly as the chocolate will harden pretty fast. As needed, place back in the freezer to harden the chocolate (but this is likely unnecessary). ENJOY! Store leftovers in an airtight container in the freezer.
Baking Tips
When preparing these frozen yogurt bars, there are a few baking tips you may want to keep in mind to ensure they turn out perfectly. First, make sure to mix the yogurt, peanut butter, and chocolate chips thoroughly. This ensures that every bite is a delicious mix of flavors and textures. If the mixture feels a bit too thick, you can add a splash of milk to loosen it up. Remember, the popsicle sticks should be placed securely and evenly in the center. This makes the bars easier to hold when they are ready to eat.
While adding nuts on top adds crunch, you can choose to mix some into the yogurt mixture instead, giving every bite a surprise element. Furthermore, if you have any leftover chocolate coating, drizzle it over the bars before storing them. This enhances the chocolatey flavor even more. Lastly, ensure they are frozen completely before removing them from the baking sheet. This will help maintain their shape and make for an easy release when enjoying your homemade dessert.
Flavor Variations
The great thing about these frozen bars is their versatility! You can enjoy them in several different flavors based on what you love. For those who prefer fruit, consider adding fresh or frozen berries to the yogurt mixture. Chopped strawberries, blueberries, or raspberries not only enhance the flavor but also add even more healthy nutrients. If you’re a fan of chocolate, you can incorporate cocoa powder into the yogurt mixture for an extra chocolatey kick.
You could also swap out the peanut butter for a flavored nut butter like almond or cashew for a new twist. If you want a tropical flavor, try adding crushed pineapple and coconut flakes into the yogurt. Finally, sprinkle some cinnamon or vanilla extract for added warmth and taste. This means you can create different flavors every time you make them, giving you endless options for a fun and enjoyable high-protein dessert!
Serving Ideas
Serving these homemade dessert bars can be as fun and creative as making them! For a casual snack, simply serve them straight from the freezer on a plate to share. If you’re hosting a party, consider arranging them on a large tray surrounded by fresh fruit like strawberries or bananas. This not only looks beautiful but allows guests to pick and choose their favorite flavors. You could also place them in small cups for easy grab-and-go servings.
For a dessert bar experience, set up a DIY toppings station. Provide a variety of options such as crushed nuts, granola, chocolate sprinkles, and more to allow guests to customize their yogurt bars. Alternatively, if you’re looking to impress, drizzle melted chocolate over them and sprinkle sea salt for a gourmet touch. These different serving ideas ensure that this dessert is suitable for casual everyday snacking, special occasions, or gatherings with friends and family.
How to Make This Recipe Healthier
To enhance the health benefits of these frozen yogurt bars, you can make a few simple adjustments. Start with using non-fat Greek yogurt instead of regular yogurt to reduce the calories and increase protein content even further. When it comes to sweetening, consider using honey, agave syrup, or maple syrup instead of sugar or chocolate chips. You can also reduce the quantity of chocolate chips and substitute with dark chocolate for a healthier sweet option.
If you’re really looking to lower the calorie count, think about omitting the chocolate coating altogether or making a lighter option with dark chocolate and less coconut oil. Adding in more fruits—like blended bananas or different berries—can also increase fiber and vitamins in the dessert while keeping it naturally sweet. Finally, consider topping these bars with seeds like chia or flaxseeds for an additional boost of healthy fats and nutrients—making this dessert not only tasty but also suitable for a well-rounded diet!
Storage Tips
Keeping your frozen yogurt bars fresh is easy if you follow a few simple storage tips. Once the bars are completely frozen, take them out of the baking sheet and wrap each one in plastic wrap or foil. This prevents freezer burn and helps maintain their delicious flavor. You can also place them in an airtight container, layering parchment paper between each bar if they’re stored in a stack.
Make sure to label the container with the date they were made for easy reference. When properly wrapped, they can last in the freezer for up to two months. For best results, avoid leaving them out at room temperature for too long, as they can melt quickly. When you’re ready to enjoy them, simply take out the number you want and let them sit for a minute or two before eating, which makes them easier to bite into. Enjoy your homemade dessert without worrying about it going bad soon!
Make-Ahead and Freezing Tips
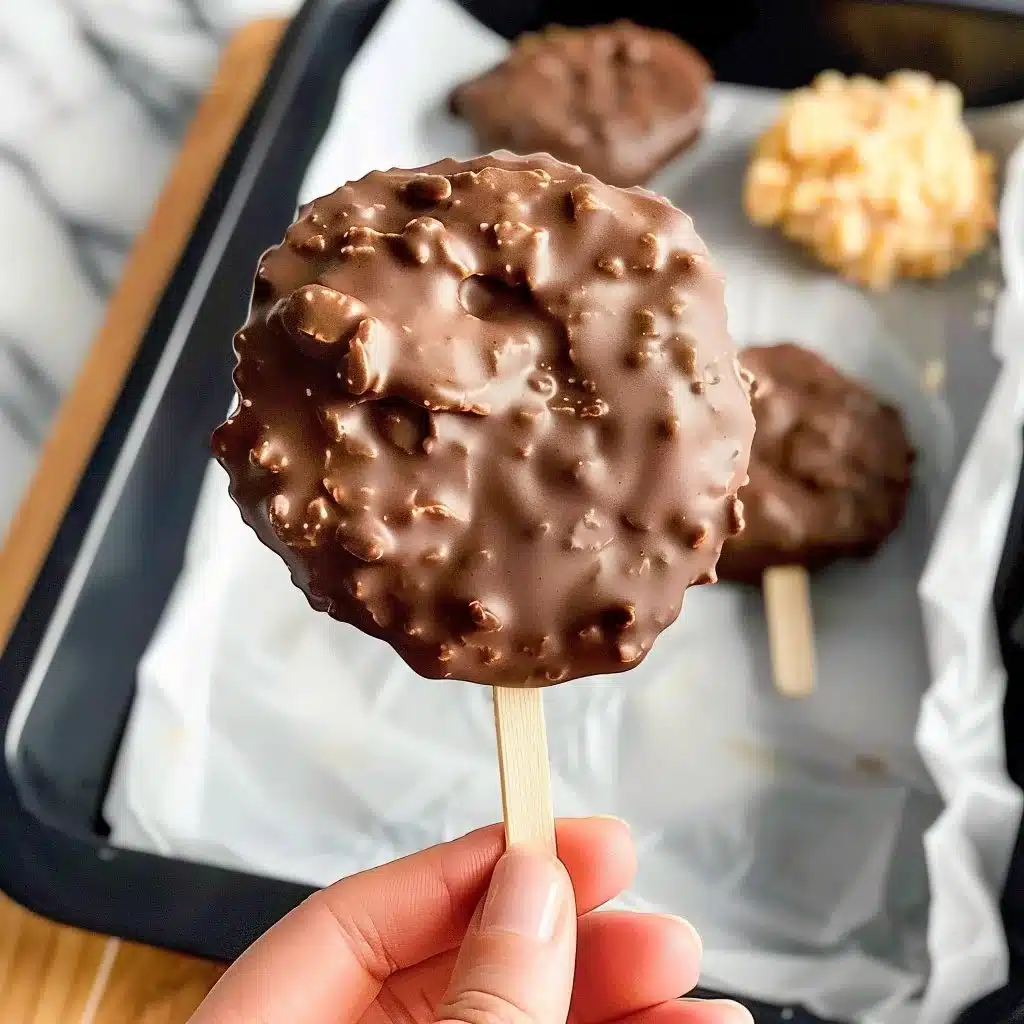
Making these frozen yogurt bars in advance is a great time-saver, especially during busy weeks. You can prepare a large batch and store them for quick snacks or desserts. To do this, follow the recipe as outlined, but consider preparing them on the weekend so they are ready for the upcoming week. Once fully frozen, transfer the bars to an airtight container or wrap them individually to keep them from sticking together.
If you want to get creative, try making different flavors during your preparation time. This ensures you have a variety of tasty treats on hand when you need them. It’s also helpful to prepare the yogurt mixture in advance, so it’s ready to be shaped and frozen whenever you have some free time. For best results, try to consume them within two months for optimal freshness. Simply take them out and enjoy knowing you have easy, healthy options ready for you anytime!
Common Questions
Can I use flavored yogurt instead of plain?
Yes, using flavored yogurt can add a fun twist to your bars. Just be cautious of additional sugars. Flavored yogurts can still offer great taste while keeping the healthy aspect of your dessert.
How do I know when they’re ready to eat?
You can tell they are ready when they are fully frozen and firm. They should be solid enough to hold their shape when you remove them from the parchment paper or mat.
Can I make these without nuts?
Absolutely! If you or someone you’re serving has a nut allergy, feel free to leave them out altogether. You can also try seeds or granola as toppings for crunch without using nuts.
These delicious yogurt bars are a fun and quick way to satisfy your sweet tooth while staying healthy. Enjoy customizing them to your liking!
Print
Frozen Yogurt Bars
- Total Time: 135 minutes
- Yield: 12 servings 1x
- Diet: Vegetarian
Description
Delicious, healthy frozen yogurt bars made with yogurt, peanut butter, and chocolate chips, perfect for hot days.
Ingredients
- 2 cups Greek yogurt
- 1 cup creamy peanut butter
- 1/2 cup chocolate chips
- 1/4 cup nuts (almonds or walnuts)
- 1 tablespoon coconut oil
Instructions
- Line a large baking sheet with parchment paper or a silicone mat.
- Mix the yogurt, peanut butter, and chocolate chips together until fully combined.
- Place piles of the yogurt mixture onto the parchment paper, about 1/4 to 1/3 of the mixture each, and shape them into circles.
- Insert a popsicle stick halfway into each dollop.
- Sprinkle the nuts evenly on top.
- Freeze for at least 2 hours or until the yogurt has completely set.
- Prepare the chocolate coating by melting chocolate chips and coconut oil in the microwave.
- Dip each yogurt pop into the melted chocolate, then return to the freezer to harden.
Notes
Store leftovers in an airtight container in the freezer for up to two months.
- Prep Time: 15 minutes
- Cook Time: 120 minutes
- Category: Dessert
- Method: Freezing
- Cuisine: American
Nutrition
- Serving Size: 1 bar
- Calories: 200
- Sugar: 10g
- Sodium: 150mg
- Fat: 10g
- Saturated Fat: 3g
- Unsaturated Fat: 5g
- Trans Fat: 0g
- Carbohydrates: 18g
- Fiber: 2g
- Protein: 9g
- Cholesterol: 5mg