
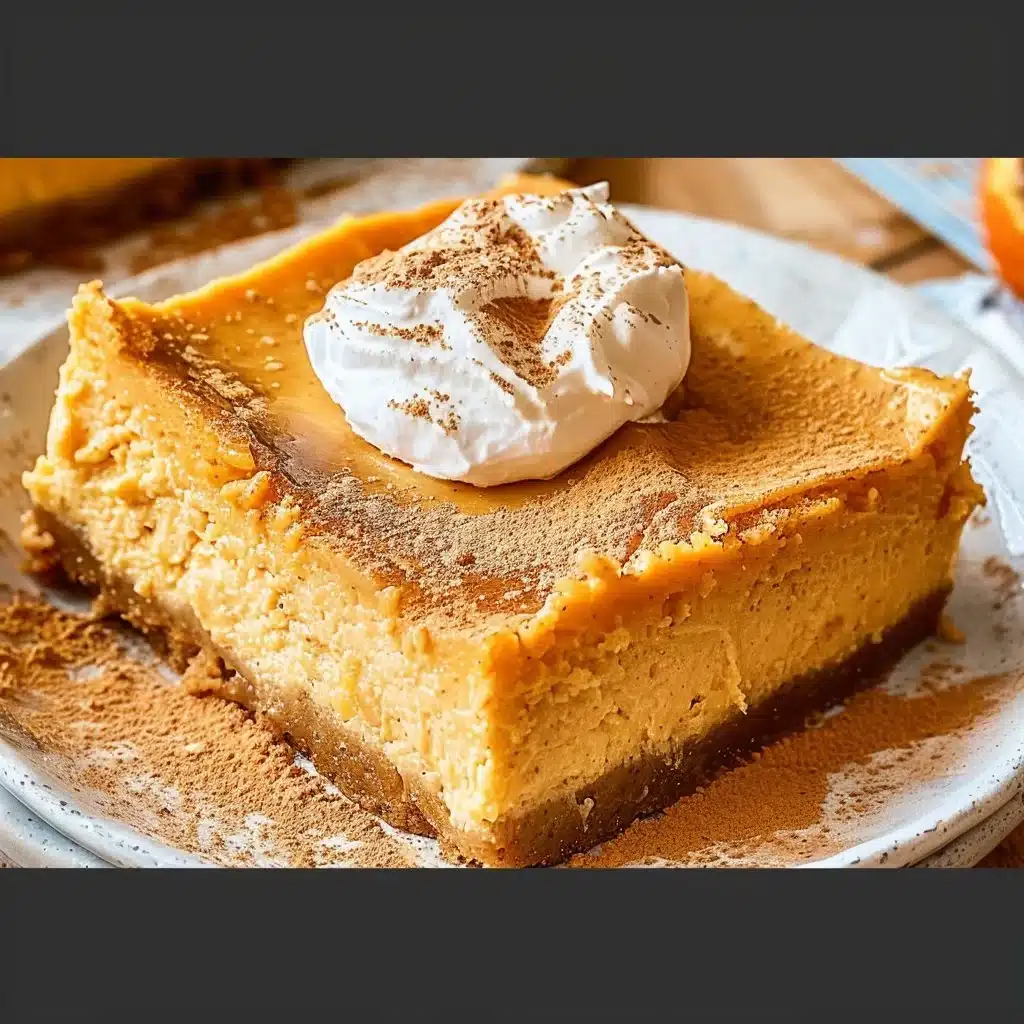
Crushed graham crackers darken slightly as melted butter disperses through the crumbs, shifting the mixture from dry sand to a compressible layer that holds a pressed edge. A blended filling of cottage cheese, pumpkin puree, and eggs moves from fluid and aerated to a uniform batter that becomes opaque and self-supporting after oven exposure.
Crumb hydration establishes the crust’s compressible phase
The crust begins with graham crackers reduced to fine particles, where surface area increases and the crumb bed becomes responsive to added fat. Melted butter coats individual crumbs and bridges gaps between particles, lowering friction so the mixture can be pushed into an even plane. Protein powder is added before pressing, and it behaves as a dry particulate dispersed through the crumbs, absorbing a portion of free moisture and tightening the crumb matrix once compression begins. The result is a mixture that holds ridges from a finger press instead of flowing back into a loose pile.
Because the butter is introduced in a liquid state, it distributes quickly and creates localized darkening where it concentrates. Scraping down the processor walls during pulsing prevents a butter-heavy ring from forming at the perimeter. By the end of mixing, the crumb mass shows two visual cues of readiness: a uniform tan tone and the ability to clump when squeezed, while still breaking cleanly when released.
Press force determines edge definition before oven contact
Once transferred to the pan, the mixture shifts from particulate to a compacted sheet. Pressing forces crumbs into closer contact, reducing visible air pockets and increasing mechanical stability. The corners are where failure typically shows first, because loose crumbs lift when the filling is poured; packing those corners until they appear slightly darker and smoother reduces that lift. A flat-bottomed cup produces a more even topography than fingers alone, because it distributes force across a larger area and prevents shallow troughs.
Compression also controls how the crust bakes. A tightly packed crust presents fewer internal pathways for steam to move upward, so the surface firms rather than puffing. When the crust is pressed firmly enough, it reads as a single layer with minimal crumb granularity visible on top, which supports clean slicing after chilling.
Short-duration crust baking shifts from pliable to set
The initial bake functions as a partial set rather than full browning. Ten minutes at 350°F raises the crust temperature enough to solidify butter within the crumb structure, converting the pressed layer into a stable base. The surface becomes slightly darker and less matte, and the perimeter begins to look more defined as the fat sets and binds the edges to the pan. This stage matters because the filling is poured onto a warm, already-formed base instead of a loose crumb bed.
The bake window is narrow: under-baking leaves the crust soft and prone to mixing at the boundary; over-baking drives off too much moisture and produces a harder edge that can fracture during cutting. A properly baked crust remains intact when nudged, but it still has a small amount of give when pressed in the center.
High-speed blending removes curd boundaries and equalizes viscosity
The filling begins with cottage cheese, which contains curds and free moisture that behave unevenly unless mechanically reduced. High-speed blending breaks curd particles into smaller fragments until the mixture shifts from granular to smooth. Pumpkin puree contributes body and color, but it also introduces additional water; blending distributes that water across the dairy base, preventing wet pockets that would otherwise set more slowly. Eggs add a fluid phase early, then become structural once heated, so they must be fully dispersed before baking to avoid streaks of uneven coagulation.
Maple syrup and tapioca flour enter as modifiers: syrup increases fluidity and adds dissolved solids that thicken slightly as water migrates, while tapioca flour hydrates and increases viscosity in the raw batter. Pumpkin pie spice disperses as a fine particulate; thorough blending prevents it from collecting in darker specks. The blended batter reads as glossy and uniform, with no visible cottage cheese grains, and it pours in a continuous ribbon rather than breaking into clumps.
Pour order creates a thermal boundary that affects early setting
The filling is poured after the crust has baked, when the base is warmer than the surrounding batter. That temperature difference creates an early-set zone at the interface, where the bottom layer of filling begins to tighten first. This reduces downward seepage into the crust and helps maintain a clean layer division. Pouring in a steady stream prevents localized pooling that can form a thicker center, while smoothing the surface minimizes peaks that brown faster than the rest of the slab.
At this stage, the pan contains three zones with different behaviors: the warm crust, the cooler filling near the top surface, and the warmer filling near the crust boundary. The top remains fluid long enough to level, while the bottom starts to hold shape sooner. Mid-paragraph references to other set-and-chill slabs can be observed in baked-and-set formats such as Caramel Apple Cheesecake Bars, where a defined base and a set top rely on distinct transitions rather than full uniform heating.
Leavening remains minimal while coagulation drives the final set
The baked filling sets primarily through protein coagulation and starch hydration rather than visible rise. Egg proteins unfold and link as internal temperature increases, converting the batter from glossy fluid to a matte, cohesive mass. Cottage cheese proteins contribute additional thickening, while tapioca flour hydrates and holds water, limiting weeping after chilling. Pumpkin puree provides pectin and fiber, which increase viscosity and reduce rapid flow even before the proteins fully set.
Visual cues of progress appear at the perimeter first. The edges become slightly darker and pull away by a thin margin, while the center moves from reflective to more matte. The top shows a gentle firmness when the pan is moved, with the center retaining only a small amount of movement. Baking is complete when the surface appears uniformly firm and the center no longer looks wet.
Room-temperature cooling redistributes residual heat before refrigeration
After oven removal, the bars remain thermally active. The pan holds heat at the center longer than at the edges, and that retained heat continues to firm the interior. A 30-minute rest at room temperature allows internal temperature to drop gradually, which reduces condensation during refrigeration and limits water collecting at the base. During this phase, the top becomes more uniformly matte, and the surface tightens enough to resist indentation.
Skipping this step moves a hot pan directly into a cold environment, increasing the risk of surface moisture and softening at the crust boundary. The room-temperature interval acts as a buffer stage, producing a more consistent set before the slab enters the colder phase where fats and hydrated starches firm further.
Refrigeration consolidates firmness and improves slicing behavior
The 1–2 hour refrigeration period completes the structural transition. Butter within the crust becomes fully solid, and the filling’s fat and water phases stabilize. As temperature drops, the filling becomes more resistant to compression, which produces clean edges when cut. The slab behaves less like a custard and more like a cohesive bar, with a top that stays intact when a knife passes through.
During this phase, minor moisture migration continues. Water moves from the center toward cooler surfaces until equilibrium is reached, but the tapioca flour and pumpkin solids reduce visible weeping. A similar cold-firming effect occurs in dairy-forward chilled desserts like Easy Cottage Cheese Pumpkin Cheesecake Recipe, where the chilled state defines the final spoon resistance and surface stability.
Topping placement remains a surface event rather than a structural change
Whipped topping sits as a separate layer with minimal integration into the chilled cheesecake surface. Because the bars are already set, the topping does not sink unless applied while the surface is still warm. When added after refrigeration, it stays on top, following the existing plane of the bars and emphasizing clean slice lines. The topping changes the visual contrast at serving but does not alter the internal cohesion established during baking and chilling.
If the topping is spread with light pressure, it forms a smooth sheet; if placed in softer mounds, it creates localized height variation without affecting the bar’s cut stability. The underlying slab maintains rigidity, and the topping simply becomes the final surface layer that can be removed or offset during slicing.
Storage holds shape while the crust slowly softens at the boundary
In an airtight container, the bars retain their geometry and keep a stable top surface for several days. Over time, the crust near the filling boundary absorbs moisture and becomes less crisp, while the center filling remains consistent due to its protein-and-starch set. Airtight storage reduces surface drying, which would otherwise show as a dull, slightly tacky film on top.
Cut edges remain clean when chilled, but they soften as temperature rises. For consistent portion edges, slicing while cold maintains the sharpest lines, and the bars continue to hold shape after transfer. The topping layer may pick up condensation if stored uncovered; covering reduces that surface moisture.
Preparation Steps
The steps below follow the established sequence without deviation.
- Preheat oven to 350.
- Add the graham crackers to a food processor and pulse until they resemble sand.
- Add in the protein powder and melted butter and pulse again a few times until combined, scraping down the sides in between.
- Spray a 9×9 baking pan with avocado oil.
- Pour the crumb mixture into the pan and press down firmly using your hands or the bottom of a round cup to form an even crust layer. You want it packed down as much as possible.
- Bake for 10 minutes.
- To a high-speed blender (or you can wash out the food processor and use that again), add the cottage cheese, pumpkin puree, eggs, maple syrup, tapioca flour, and pumpkin pie spice.
- Blend on high for 2 minutes or until very smooth and creamy.
- Remove the crust from the oven and pour the mixture over the crust.
- Bake for 35-40 minutes or until the top of the pumpkin bars appear firm.
- Let it cool at room temp for 30 minutes, then refrigerate for 1-2 hours.
- Top with whipped topping of choice and enjoy!
After refrigeration, the slab cuts into defined bars with a firm base and a set center that resists slumping. The surface remains stable under topping, and the interior holds an even density from edge to center once fully chilled.
Print
Easy Pumpkin Cheesecake Bars (Protein-Packed)
- Total Time: 65 minutes
- Yield: 16 servings 1x
- Diet: Gluten-Free, High Protein
Description
Delicious and protein-packed pumpkin cheesecake bars with a firm graham cracker crust and creamy filling, perfect for fall desserts.
Ingredients
- 1 ½ cups graham crackers, crushed
- ½ cup protein powder
- ½ cup butter, melted
- 1 cup cottage cheese
- 1 cup pumpkin puree
- 2 large eggs
- ½ cup maple syrup
- ¼ cup tapioca flour
- 1 tsp pumpkin pie spice
- Whipped topping for serving
Instructions
- Preheat oven to 350°F (175°C).
- Add the graham crackers to a food processor and pulse until they resemble sand.
- Add in the protein powder and melted butter and pulse again until combined.
- Spray a 9×9 baking pan with avocado oil.
- Pour the crumb mixture into the pan and press down firmly to form an even crust layer.
- Bake the crust for 10 minutes.
- In a high-speed blender, add the cottage cheese, pumpkin puree, eggs, maple syrup, tapioca flour, and pumpkin pie spice.
- Blend on high for 2 minutes or until very smooth and creamy.
- Remove the crust from the oven and pour the filling over it.
- Bake for 35-40 minutes or until the top appears firm.
- Let it cool at room temperature for 30 minutes, then refrigerate for 1-2 hours.
- Top with whipped topping of choice and enjoy!
Notes
For best results, allow the bars to fully set in the refrigerator before serving.
- Prep Time: 15 minutes
- Cook Time: 50 minutes
- Category: Dessert
- Method: Baking
- Cuisine: American
Nutrition
- Serving Size: 1 bar
- Calories: 180
- Sugar: 10g
- Sodium: 150mg
- Fat: 7g
- Saturated Fat: 4g
- Unsaturated Fat: 2g
- Trans Fat: 0g
- Carbohydrates: 20g
- Fiber: 2g
- Protein: 6g
- Cholesterol: 55mg